Water Heater Not Draining? How to Fix a Clogged Tank
Troubleshoot a water heater that won't drain. Step-by-step fixes for clogged drain valves, sediment blockages, and stuck valves.

April 1, 2026
Safety Disclaimer
Water heater maintenance involves working with pressurized systems, scalding hot water, and potentially hazardous electrical or gas connections. Always shut off power (electric heaters) or gas supply (gas heaters) and allow water to cool to a safe temperature before beginning any maintenance. Wear appropriate safety equipment including gloves and eye protection. If you're uncomfortable with any step, contact a licensed plumber.
Unique angle here: why the tank will not empty — vacuum, kink, clog, or a seized handle — before you assume a longer hose. Valve-only clogs are how to unclog a water heater drain valve. No floor drain is how to drain a water heater with no floor drain.
Desk note: This page does not invent a clog-rate statistic for every tank. Sediment at the valve is the pattern owners and plumbers document most often. Manufacturer manuals still put a flush on the schedule. They do not publish a desk-measured blockage percent. This is a HowToDrainAHotWaterHeater.com Editorial Team research-desk sequence, not a shop diary.
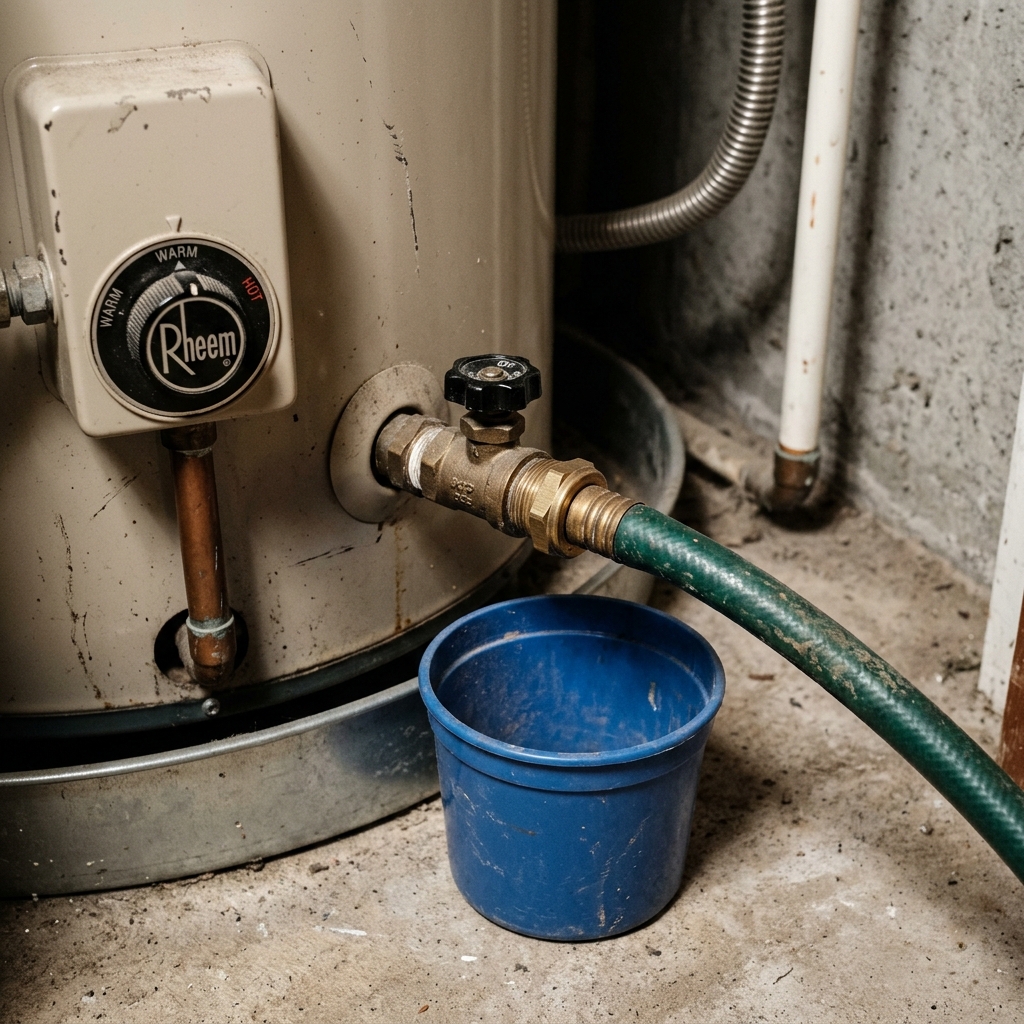
You hooked up the garden hose, opened the drain valve, and nothing came out. Or a thin trickle started and then stopped. This is one of the most frustrating water heater problems because you are trying to do the right thing by maintaining the tank, and the tank will not cooperate.
The cause is usually sediment blocking the drain valve, or a setup miss that looks like a clog. You can often fix it without special tools. Work the checks in order.
Before You Force the Drain
Do this in order. Buying a “water heater drain kit” that is just a shop vac is how people pull a full tank onto a finished floor.
- Cut the heat and let the tank cool. Gas: control to Off or Pilot per the label. Electric: breaker off. The power-off sequence lives on how to drain a hot water heater.
- Check the boring failures first. Valve fully open. Hot faucet open so the tank can take air. Hose downhill, no kink, hose end not submerged. Those four miss more jobs than people admit.
- Look at the valve body. A cracked plastic valve is a replacement, not a longer wait — how to replace a water heater drain valve. A drip after you close it is drain valve leaking.
- Confirm a discharge path. Floor drain, sink, window, pump, or buckets. No floor drain: how to drain a water heater with no floor drain.
- Then hose or upgrade the valve. A Flexzilla 5/8-inch by 50-foot garden hose is the hose this site already points at: garden-hose thread, stays flexible in a closet. If the factory plastic valve is why the tank will not empty, the Camco brass drain valve is the garden-hose-thread replacement already used on this site — install it after the water line is below the port, not as a “force the old valve” tool. A tagged water-heater brass drain valve search is safer than guessing a shop-vac kit ASIN.
Listing check (not-draining valve, not a shop-vac kit): confirm a water-heater brass drain valve with a garden-hose-thread outlet — wet/dry vac “water heater drain kits” and boiler drain cocks share the same clogged-tank browse.
Money story: how we make money. Flush siblings: how to flush hub.
Why Water Heaters Stop Draining
When you open the drain valve, water should flow by gravity through the valve and out the hose. For that to work, two things need to happen: the valve must open fully, and the path through the valve must be clear.
Here is what goes wrong:
Sediment Blockage
This is the pattern this desk sees most often in owner and plumber write-ups. Mineral sediment that has been settling at the tank bottom migrates into the drain valve opening when you open it. The sediment is dense enough to plug the small opening, especially on standard plastic drain valves with a narrow bore.
The irony is not lost on anyone: you are trying to flush out the sediment, and the sediment is preventing you from flushing. This is why regular maintenance matters. If you have never flushed your water heater or have not done it in several years, the blockage can be substantial. Energy.gov treats flushing as maintenance. It does not publish a desk-measured efficiency percent for every tank.
Stuck or Corroded Valve
Some drain valves seize after years of disuse. Plastic valves can warp slightly from heat exposure. Brass valves can corrode, especially if the tank water is acidic or the anode rod is depleted. If the handle turns but no water flows, the valve is clogged. If the handle will not turn at all, the valve is stuck.
Closed Cold Water Supply / No Air Inlet
This is the embarrassing one, but it happens. If no air can enter the tank to replace the draining water, you get a vacuum that stops the flow. The cold water supply is usually turned off before draining, but the tank still needs an air inlet — usually a hot water faucet opened upstairs.
Kinked or Uphill Hose
The hose attached to the drain valve must run downhill to a lower drain point. If the hose kinks, loops upward, or terminates at a point higher than the drain valve, water will not flow. Gravity is doing all the work here.
Step-by-Step Troubleshooting
Work through these in order. Start with the simplest fix and escalate only if needed. The valve-only screwdriver, back-flush, removal, and vinegar steps are expanded on how to unclog a water heater drain valve. This page is the decision tree that gets you there.
Step 1: Check the Basics
Before assuming the worst, verify:
- The drain valve is fully open. Turn it counterclockwise until it stops. Some valves need a full turn; others need several turns.
- A hot water faucet is open somewhere in the house. This breaks the vacuum inside the tank and allows air in. Open the faucet closest to the heater, preferably on the floor above.
- The hose has no kinks. Walk the length of the hose and straighten any bends. Make sure the end is lower than the drain valve.
- The hose end is not submerged. If you are draining into a bucket or sink, make sure the hose end is above the water level in the container.
If water starts flowing after these checks, you had a simple setup issue, not a blockage.
Step 2: Break the Blockage With a Screwdriver
If no water flows and the basics check out, sediment is likely blocking the valve.
- Disconnect the garden hose from the drain valve.
- Place a bucket directly under the valve.
- Open the valve fully.
- Insert a long flat-head screwdriver into the valve opening.
- Gently push and rotate to break up the sediment plug.
- Be ready for a sudden rush of water and sediment once the blockage clears.
Wear gloves and keep your face back. The water may still be warm, and sediment-laden water will make a mess. This method works for soft, loose sediment clogs.
Step 3: Back-Flush the Valve
If the screwdriver method does not clear the blockage, you need to push water backward through the valve to dislodge the sediment from the other side.
- Close the drain valve.
- Attach a short garden hose to the drain valve.
- Connect the other end of the hose to a nearby hose bib (outdoor faucet) or use a washing machine hookup.
- Open the hose bib to force pressurized water backward through the drain valve and into the tank.
- Let it run for 30 seconds to a minute.
- Close the hose bib, disconnect the hose from the supply, and try draining again.
House supply pressure (often 40 to 60 PSI) is stronger than gravity. It can break through sediment blockages that a screwdriver cannot reach. For the full technique, see our dedicated back-flush guide.
Step 4: Remove the Drain Valve
If back-flushing does not work, the blockage is too dense for water pressure to clear. The next step is removing the drain valve entirely to create a larger opening.
Warning: Removing the drain valve with water in the tank means the water will rush out. Make sure the water has cooled and you have towels, a bucket, and a plan for where the water will go. If the valve will not turn, stop. That is skip-DIY.
- Shut off the cold water supply if you have not already.
- Use channel-lock pliers or a wrench to unscrew the drain valve counterclockwise.
- As soon as the valve loosens, water and sediment will begin flowing. Control the flow by tightening and loosening the valve.
- Once the valve is fully removed, sediment should flow freely through the larger opening.
- Use a stiff wire or coat hanger to reach into the opening and break up any remaining material.
- When the tank is empty, install a new drain valve. Consider upgrading to a full-port brass ball valve for easier draining in the future. Our guide on replacing a water heater drain valve covers the installation.
Step 5: The Vinegar Soak (For Hardened Sediment)
If you have removed the valve and sediment is still not coming out, the deposits have likely calcified into a hard crust.
- With the drain valve removed or open, pour two to three gallons of white vinegar into the tank through the drain opening (use a funnel and hose) or through the anode rod port at the top.
- Close everything up and let the vinegar sit for six to twelve hours. The acetic acid dissolves calcium deposits.
- Open the drain and flush with fresh water.
- Repeat if necessary.
This is slow. Manufacturer language talks about flushing and, on some tanks, a vinegar clean. It is not a published efficiency recovery.
Preventing Future Blockages
Once you have finally gotten the tank drained, take steps to prevent a repeat:
Flush on a schedule. Regular flushing keeps sediment loose and manageable. Do not wait until it hardens. Interval: how often to flush.
Upgrade the drain valve. Factory-installed plastic drain valves have a narrow bore that clogs easily. A brass ball valve with a full-port opening is far less likely to clog. The parts cost is a research-range $10 to $25.
Address hard water. If your water is hard, a whole-house softener prevents most sediment from forming in the first place. It is an investment, but it protects every water-using appliance in your home.
Check the anode rod. A depleted anode rod allows corrosion that adds rust particles to the sediment mix. Rust makes the sediment stickier and harder to flush.
Skip the Forced Drain, Call a Plumber
- You smell gas, or the T&P is dumping steadily
- The valve is seized and will not turn without loading the tank fitting
- Water is coming from the steel shell or under the foam — that is replacement, not a clog
- You cannot isolate an electric tank at the breaker
- You have tried the unclog sequence and the tank still will not move water
- The tank is more than about 10 to 12 years old and heavily clogged — professional descaling may not beat replacement
For guidance on when to DIY versus hire a plumber, see our repair decision guide. Symptom index: troubleshooting.
Related Guides
- How to Replace a Water Heater Drain Valve
- How to Unclog a Water Heater Drain Valve
- Water Heater Drain Valve Leaking
- How to Drain a Water Heater With No Floor Drain
- How to Drain a Hot Water Heater
- How to Back Flush a Water Heater
- Water Heater Safety Guide
- How to Flush Hub
- Water Heater Maintenance Tools
- Water Heater Troubleshooting
- How We Make Money
Sources
- U.S. Department of Energy, Water Heating, flush-as-maintenance language
- International Association of Certified Home Inspectors, water heater maintenance standards
- Manufacturer use-and-care manuals for drain-valve clogs versus tank-shell failure
Editorial Team
Nobody should pay a plumber $300 to turn a drain valve. Our guides are built from manufacturer documentation, plumbing code references, and the documented experience of homeowners and plumbers.