How to Flush Your Water Heater: Step-by-Step Guide
Sediment builds up in your tank every year, reducing efficiency and shortening lifespan. Flushing takes 30 minutes and costs nothing.

May 10, 2026
Safety Disclaimer
Water heater maintenance involves working with pressurized systems, scalding hot water, and potentially hazardous electrical or gas connections. Always shut off power (electric heaters) or gas supply (gas heaters) and allow water to cool to a safe temperature before beginning any maintenance. Wear appropriate safety equipment including gloves and eye protection. If you're uncomfortable with any step, contact a licensed plumber.
Unique angle here: a compact hose-and-valve sequence. The complete sediment-and-vinegar version is How to Flush a Water Heater (Complete Guide).
Desk note: This page does not invent a “25 percent efficiency” figure. Sediment steals volume and makes noise; Energy.gov and manufacturer manuals tell you to flush. They do not publish a desk-measured percent for every tank. Time estimates assume a valve that opens and a drain path that exists.
Flushing is not the same as condemning the tank. A cloudy first quart is maintenance. Water from the steel shell is replacement — DIY vs plumber. A gas pilot that will not hold is a different parts list: pilot light compact list.
Before You Connect the Hose
- Bucket test. Open the drain valve into a bucket or a clear jug for a quart, then close it. Sandy or cloudy water means flush. A dribble that will not move means a clog or a seized valve, not a longer hose — water heater not draining and how to unclog a drain valve.
- Confirm a drain path. Floor drain, utility sink, or a routed hose outdoors. No floor drain: how to drain a water heater with no floor drain.
- Cut the heat and let the tank cool. Gas: control to PILOT or OFF per the label. Electric: breaker off. Do not flush scalding water across a walkway or a finished floor.
- Look at the valve body. A cracked plastic drain valve is a replacement, not a flush. Upgrade path: how to replace a water heater drain valve.
- Then hose. A Flexzilla 5/8-inch by 50-foot garden hose is the hose this site already points at: garden-hose thread, stays flexible in a closet. Do not dump the first hot minutes where a person or pet can step.
Listing check (compact flush hose): confirm 5/8-inch garden-hose thread and a jacket sold for outdoor or utility use — drinking-water RV hoses and washing-machine fill lines share the same hose browse.
Next-flush timing from hardness and tank age is the flush schedule calculator. Hardness number first if every flush comes out like wet sand: how hard water destroys a water heater.
Why Flushing Matters
Minerals drop out as sediment on the tank floor. Over time that layer:
- Steals usable volume so the tank “feels small”
- Traps steam and makes popping and rumbling
- Overheats the steel under a hard crust and speeds corrosion
- Packs the drain valve so the next maintenance job will not start
Manufacturer manuals still put an annual flush on most tanks, and a shorter interval in hard water. That is a schedule, not a guarantee the tank will last a published 8–12 years.
What You Need
- Garden hose with garden-hose thread (hot drain water will travel it)
- Bucket or clear jug (the grit check)
- Flathead screwdriver or pliers for a slot-head drain valve
- Safety glasses and gloves
- A path that can take hot, dirty water
If the factory plastic valve is the reason you have been skipping this job, a Camco brass drain valve is the 1/2-inch garden-hose-thread replacement already used on this site. Replace it on a drained tank. Do not force a seized plastic handle until it snaps off in the tank.
Hose-and-Valve Sequence
1. Turn Off the Heat Source
- Gas: Turn the gas control to PILOT or OFF, matching the jacket label.
- Electric: Turn off the breaker. Electric elements burn out if they fire in air. Refill completely before the breaker goes back on — extra electric steps are in how to drain an electric hot water heater.
2. Connect the Hose
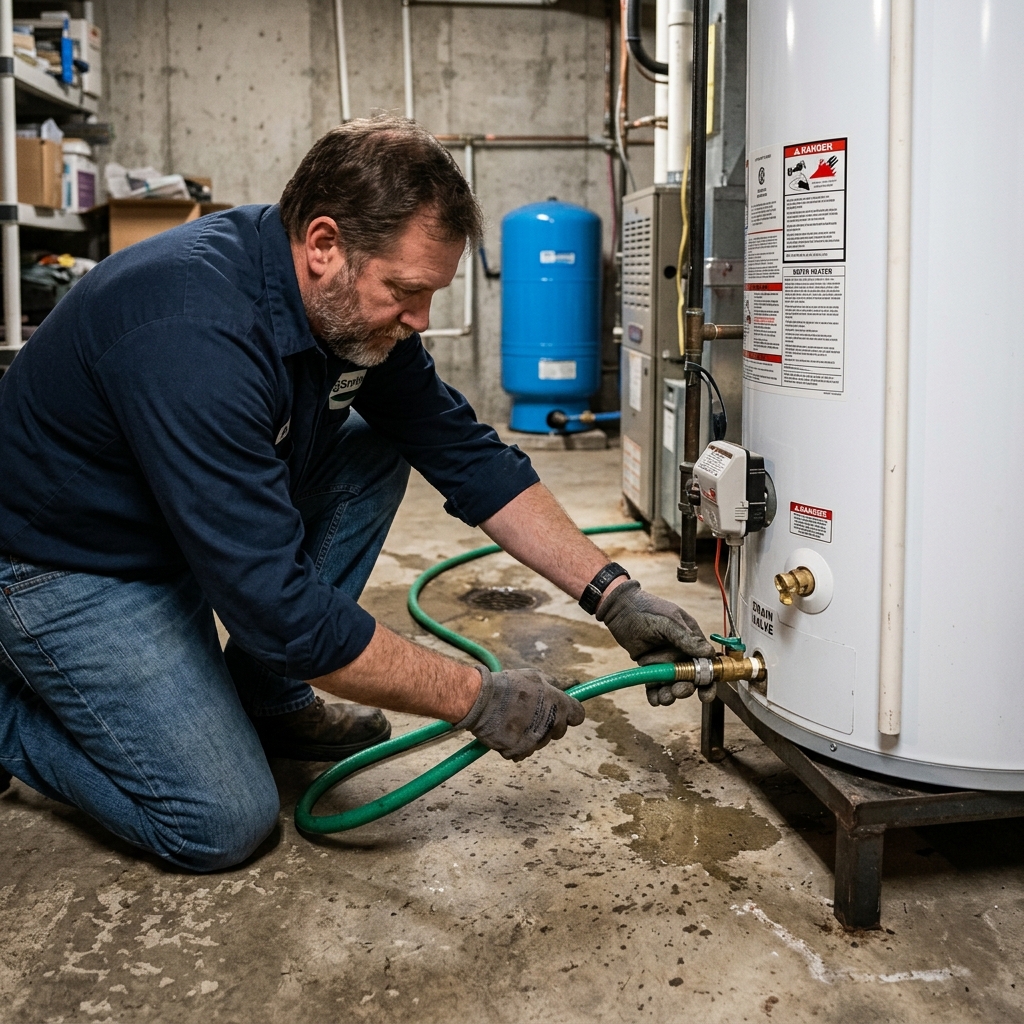
Attach the hose to the drain valve. Run the other end to the drain path you already confirmed.
3. Turn Off the Cold Water Supply
Close the cold-water shut-off on top of the heater. If you cannot find that valve, stop. You cannot control the refill.
4. Break the Vacuum
Open a hot faucet upstairs, or lift the T&P lever briefly so air can enter. If the T&P weeps afterward, that is how to fix a leaking relief valve, not a reason to skip the refill.
5. Open the Drain Valve
Turn the drain valve open. The first gallon is the sample. Cloudy or sandy is expected on a neglected tank.
6. Flush Until the Stream Clears
When the tank is mostly empty, crack the cold-water supply to stir remaining grit, then let it run out. Repeat until the bucket sample is as clear as the incoming cold. If the valve only dribbles, stop and treat it as a clog, not a longer wait.
7. Close, Refill, Bleed Air
Close the drain valve. Close the T&P if you opened it. Open the cold supply. Leave a hot faucet open until the sputter stops. That is air leaving the lines.
8. Restore Heat After the Tank Is Full
Gas: control back to ON per the label. Electric: breaker on only after the tank is full and the faucet runs steady. Wait for a full reheat before you call the job a failure. No hot water after a flush is no hot water after flushing.
Repairable vs Replace
Repairable: cloudy drain water, popping that quiets after a real flush, a drain valve you can upgrade after the tank is empty.
Replace the tank: water weeping from the steel jacket, rust flakes that return after a long clear flush, or a bottom that will not move water because it has mineral-concrete. Walk 7 signs a water heater is failing before you buy a heater because the first quart was brown.
Fuel and machine type if you are replacing on purpose: electric vs. gas and tank vs tankless.
Skip the Hose, Call a Plumber
- Seized or cracked drain valve you cannot open without breaking the tank fitting
- Water from the steel shell or under the foam
- An electric tank you cannot isolate at the breaker
- No drain path and no way to pump or window-route the discharge
- Gas odor, a T&P that dumps steadily, or a flue that is spilling
The longer vinegar method and the drain-vs-flush table live in how to flush a water heater (complete guide). The how to flush hub collects the live siblings.
Related Guides
- How to Flush a Water Heater (Complete Guide)
- How to Drain a Hot Water Heater
- How to Drain a Water Heater With No Floor Drain
- Water Heater Not Draining
- How to Replace a Water Heater Drain Valve
- Water Heater Repair: DIY Fixes vs. When to Call a Plumber
- Electric vs. Gas Water Heaters
- Tank vs. Tankless Water Heaters
- Water Heater Pilot Light Compact List
- Flush Schedule Calculator
- How to Flush Hub
Sources
- U.S. Department of Energy, Maintain Your Water Heater, flush-as-maintenance language
- Manufacturer use-and-care manuals (Rheem, A.O. Smith, Bradford White) for drain-valve and dry-fire warnings
Editorial Team
Nobody should pay a plumber $300 to turn a drain valve. Our guides are built from manufacturer documentation, plumbing code references, and the documented experience of homeowners and plumbers.