Water Heater Leaking from Bottom: Causes and Fixes
Water pooling under your water heater? Here are the 6 most common causes and how to fix each one before it floods.

May 26, 2026
Safety Disclaimer
Water heater maintenance involves working with pressurized systems, scalding hot water, and potentially hazardous electrical or gas connections. Always shut off power (electric heaters) or gas supply (gas heaters) and allow water to cool to a safe temperature before beginning any maintenance. Wear appropriate safety equipment including gloves and eye protection. If you're uncomfortable with any step, contact a licensed plumber.
Unique angle here: a puddle at the base is a drain valve, a T&P discharge pipe, condensation, a top fitting, or the steel shell — wipe and isolate the source before you shop a tank. Valve-only drips stay on water heater drain valve leaking. Popping plus water on the floor is water heater making popping noises.
Desk note: Cost figures below are research ranges from typical hardware and service-call listings, not quotes. This is a HowToDrainAHotWaterHeater.com Editorial Team research-desk sequence from manufacturer leak labels and inspector write-ups, not a staged flood lab and not a shop diary. This desk does not invent a “most leaks are $30” guarantee.
Finding water pooled around the base of your water heater is one of those moments that can ruin a morning. Before you panic and start shopping for a new unit, take a breath. Not every leak from the bottom means the tank has failed. Many bottom leaks come from replaceable fittings.
Most bottom leaks are a drain valve, T&P discharge, or a fitting, not a failed tank. The other common story is waiting too long on a real tank leak until 40 gallons are on the basement floor.
Here is how to figure out what is leaking, why, and what to do about it.
Before You Wipe the Floor
Do this in order. Buying a replacement heater from a puddle photo is how people replace a $15 drain valve with a $1,500 tank — or ignore a shell leak until the finished floor is gone.
- Cut the heat and the inlet. Electric: breaker off. Gas: control to Off or Pilot per the label. Then close the cold supply on top. Water and 240-volt elements do not mix. Neither do water and an open gas control.
- Let the tank cool if it is still hot. Water at 120°F or higher can scald. Energy.gov and burn-prevention tables treat 120°F as the usual residential setpoint conversation, not a desk-measured burn clock for your floor.
- Wipe everything dry and lay paper towels at each source. Drain valve. T&P discharge pipe. Top inlet/outlet. Element panels (electric). Jacket at the very base. The first wet towel is the diagnosis.
- Decide valve vs shell before you open a listing. Fresh water from the hose nipple or valve-to-tank threads is a valve job — water heater drain valve leaking and how to replace a water heater drain valve. Water from the steel shell or under the foam is replacement, not a cap. Hazard sequence: water heater safety.
- Then open a listing only if the source is a part. A garden hose cap is the brass-cap SKU this site already points at: rubber washer, garden-hose thread — a backstop, not a new valve. The Camco brass drain valve is the garden-hose-thread replacement already used on this site. A Watts 3/4-inch T&P relief valve is the 150 PSI / 210°F residential valve already used on this site if the discharge pipe is the wet spot. If the tank stays in service, a Camco drain pan plus the Govee WiFi water leak detector three-pack is the pan-and-puck pair already on this site — one sensor in the pan is enough. Compare detectors in best water leak detectors. A tagged water-heater drain pan search is safer than guessing a whole-house shutoff ASIN.
Listing check (bottom-leak pan, not a shutoff kit): confirm a water-heater drain pan with a side drain fitting plus a floor or pan sensor — whole-house automatic shutoff valves and washing-machine drip trays share the same leak-browse page.
Money story: how we make money. Symptom index: troubleshooting.
Cause 1: Drain Valve Leak
The drain valve is the hose bib at the bottom of the tank. It is the most common source of bottom leaks, and usually the easiest to fix.
Why It Leaks
- Sediment lodged in the valve seat prevents it from closing fully
- The valve washer has worn out
- The plastic valve body has cracked (common on cheaper units)
- The valve was not closed completely after the last drain and flush
How to Fix It
Step 1: Check that the valve is closed. Turn it clockwise until it stops. If it feels gritty, sediment may be caught in the seat.
Step 2: Open and close the valve two or three times to clear any sediment. Place a bucket underneath to catch water.
Step 3: If it still drips, attach a garden hose cap to the valve as a temporary fix while you plan the replacement.
Step 4: For a permanent fix, replace the valve entirely. Brass ball-style drain valves like the Camco Brass Drain Valve are far more reliable than the plastic originals. We have a full guide on how to replace a water heater drain valve.
Research-range cost: $10 to $30 for the part. Time is a research snapshot, not a desk stopwatch on your tank.
Cause 2: T&P Relief Valve Discharge
The temperature and pressure (T&P) relief valve is a safety device on the side of the tank, near the top. It has a discharge pipe that runs down the side of the tank to within 6 inches of the floor. When this valve activates, water exits from the bottom of the discharge pipe, making it look like the tank is leaking from below.
Why It Discharges
- Normal operation: The valve opens when tank pressure exceeds 150 PSI or temperature exceeds 210 degrees F. If it is doing this, something is causing excessive pressure or heat.
- Thermal expansion: In a closed plumbing system (with a backflow preventer), heated water expands with nowhere to go, building pressure. An expansion tank solves this.
- Failed valve: A worn T&P valve can weep or drip even at normal pressure.
- High water pressure: If your incoming water pressure exceeds 80 PSI, the heater is under stress. A pressure-reducing valve on the main line is the fix.
How to Fix It
Test the valve by lifting the lever for 2 to 3 seconds. Water should flow, then stop completely when you release the lever. If it keeps dripping, the valve needs replacement.
T&P valve replacement is a straightforward DIY job. A Watts 3/4-Inch T&P Relief Valve fits most residential water heaters. The full leak-vs-pressure diagnosis is in how to fix a leaking relief valve.
If the valve is operating correctly but discharging regularly, the root cause is pressure. Check your home’s water pressure with a gauge and verify whether you have a closed system that needs an expansion tank.
Cause 3: Condensation
This is the “leak” that is not actually a leak. When cold water fills a hot tank rapidly, or when the surrounding air is humid, moisture condenses on the tank exterior and drips to the floor. It can produce a surprising amount of water.
How to Identify It
- The water is clean and clear, with no rust or discoloration
- The dripping increases after heavy hot water use
- There is no single source point; the entire tank surface seems damp
- The heater is relatively new (newer tanks condense more during the break-in period)
What to Do
Nothing, usually. Condensation is normal during heavy use cycles and resolves on its own. If it is constant, your thermostat may be set too low, causing the burner to run longer and exposing more of the tank surface to temperature differentials. Check that the thermostat is set to 120 degrees F. For help with this, see our temperature settings guide.
Cause 4: Inlet and Outlet Connection Leaks
The cold water inlet and hot water outlet connections at the top of the tank can develop leaks that run down the side of the tank and pool at the bottom.
Why They Leak
- Loose fittings that were never properly tightened during installation
- Corroded connections, especially in homes with copper pipes connected to galvanized nipples (galvanic corrosion)
- Dielectric unions that have degraded
How to Fix It
Dry the fittings at the top of the heater and wrap a paper towel around each connection. Check 10 minutes later to see which one is wet. Tighten the fitting with a pipe wrench. If the connection is corroded, replace the flex lines or nipples.
Research-range cost: $5 to $20 for new flex connectors. Time is a research snapshot, not a quote.
Cause 5: Internal Tank Failure
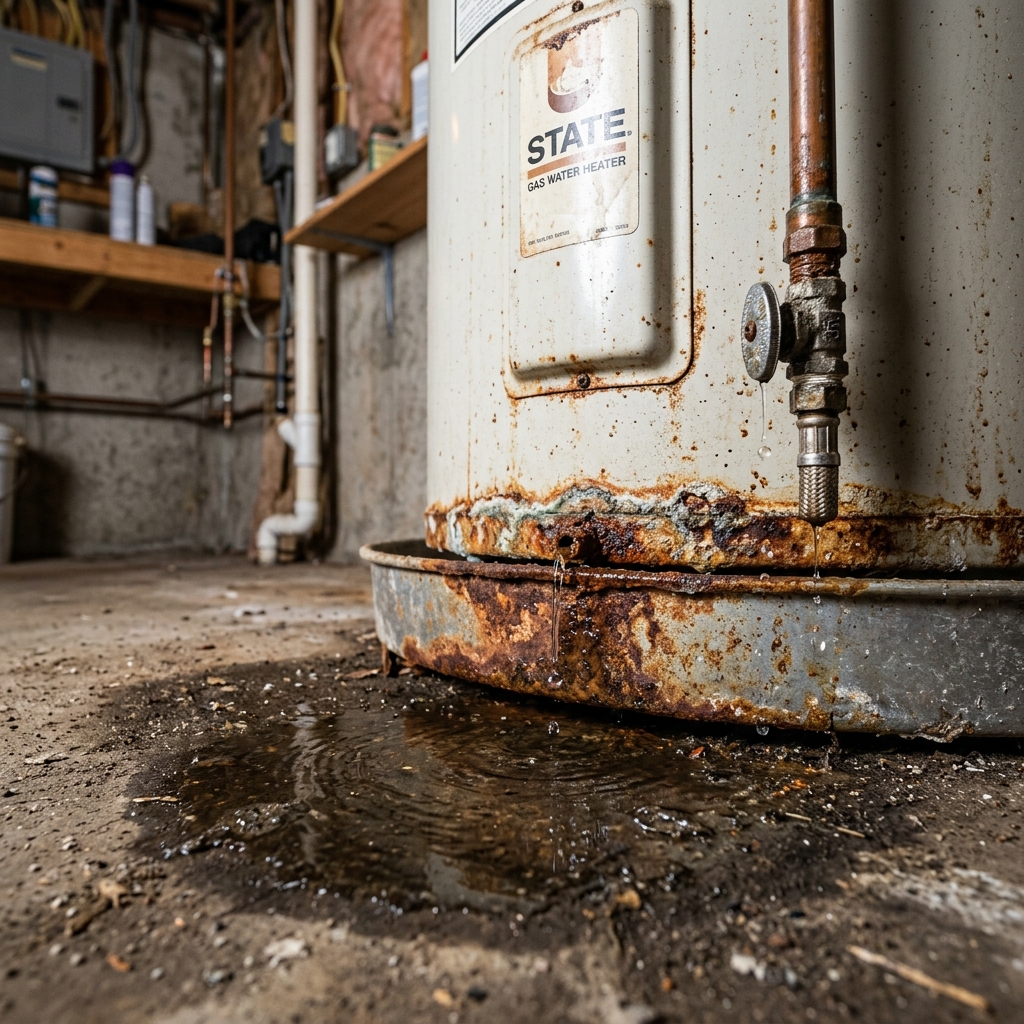
This is the one nobody wants to hear. If the tank itself has corroded through, water seeps through the steel wall and pools at the base. There is no repair for this. The tank needs to be replaced.
How to Identify It
- Water appears at the very base of the tank, not from any fitting or valve
- The water is rust-colored or has a metallic smell. If the same color is coming from the hot taps, see why hot water is brown or rusty.
- The heater is over 8 years old with no history of anode rod replacement
- You can see visible rust stains or blistering on the outer jacket near the bottom
What to Do
- Turn off power and water supply immediately
- Connect a garden hose and drain the tank to prevent flooding
- Call a plumber or start shopping for a replacement
- Consider whether you want to replace with the same type or switch to tankless
Internal tank failure is almost always caused by a depleted anode rod. The rod corrodes to protect the tank. When it is consumed and not replaced, the tank becomes the sacrificial metal. Regular anode rod inspection every 3 to 5 years is the best way to prevent this.
Cause 6: Heating Element Gasket Leak (Electric Only)
Electric water heaters have one or two heating elements that screw or bolt into the tank. Each element has a rubber gasket that seals it against the tank wall. Over time, these gaskets harden, crack, and begin to weep.
How to Identify It
- Water appears near the element access panels on the side of the tank
- The leak increases when the element heats up (thermal expansion of the gasket)
- Removing the access panel cover reveals moisture around the element flange
How to Fix It
Turn off the breaker and drain the tank below the element level. Remove the element with an element wrench, replace the gasket, and reinstall. While you have the element out, inspect it and replace if it shows heavy scale buildup.
Our guide to testing water heater elements covers how to check whether the element itself needs replacing while you are in there.
Research-range cost: $3 to $8 for a gasket. Elements often land $8 to $20 each. Those are listing snapshots, not a hardware-store quote.
Diagnostic Flowchart
When you find water at the base, work through this checklist:
- Wipe everything dry and lay paper towels at each potential source
- Check the drain valve first. Is it closed? Is it dripping?
- Check the T&P discharge pipe. Is water coming from the end of the pipe?
- Inspect the top connections. Trace any moisture downward from the inlet/outlet
- Look at the element panels (electric only). Any moisture around the flanges?
- Check the tank surface. If water appears to weep from the tank body with no other source, the tank has failed
Skip the Wipe, Call a Plumber
- You smell gas — leave, call the gas company from outside. That is water heater safety, not a paper-towel afternoon
- Water is coming from the steel shell or under the foam, not a fitting
- The T&P is dumping steadily after you replace the valve — that is pressure or heat, not another SKU
- A fitting is seized or deeply corroded and will not turn without loading the tank weld
- You cannot isolate an electric tank at the breaker (panel work is not this page)
- The tank sits over finished floor and you cannot control the remaining water
Handle a confirmed valve, hose-cap, or gasket leak yourself if the tank is isolated and the threads look intact. A standard tank replacement is a research-range $800 to $2,000 installed, not a quote from this desk.
For the DIY-versus-call split: water heater repair: DIY vs. plumber. No hot water at all: hot water heater not working. Cold after a flush: no hot water after flushing.
Related Guides
- Water Heater Making Popping Noises
- Hot Water Heater Not Working
- No Hot Water After Flushing
- Water Heater Safety Guide
- Water Heater Drain Valve Leaking
- How to Replace a Water Heater Drain Valve
- How to Drain a Hot Water Heater
- How to Flush Hub
- Water Heater Maintenance Tools
- Water Heater Troubleshooting
- How We Make Money
Sources
- Rheem Water Heater Troubleshooting Guide, Manufacturer diagnostic procedures
- A.O. Smith Owner’s Manual, Leak identification and safety protocols
- U.S. Department of Energy, Water Heating, Maintenance and safety best practices
Editorial Team
Nobody should pay a plumber $300 to turn a drain valve. Our guides are built from manufacturer documentation, plumbing code references, and the documented experience of homeowners and plumbers.